 |
| BEFORE |
 | ||||||||
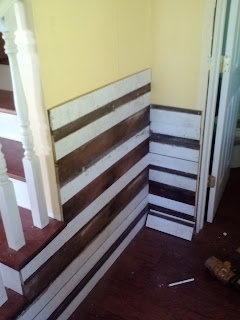
| AFTER |
First I took off all the existing trim and marked my studs...well, actually my stud helped me find the studs.


And then, with a little help from my saw and air-nail gun, I was off (how about that saw setup)
I used old boards that I found in my dad's barn (I love that place). I flipped them around so there was never a consistent pattern or look. I have to admit, those first few boards I placed had me doubting myself, but the more I got done the more I loved it.
Finished it up, rehung the trim and, TA-DA, fun spaceat my entry. Hung a few of my old trucks, rehung the generic IKEA mirror and we are back to business as usual, except now the cute level has been raised.
I have to say, the hubster was pretty hands off with this project with the exception of finding the studs and helping with a trim corner. If you are pretty handy with a saw and nail gun, this is a very feasible project for a party of 1.


I love it!!!!!
ReplyDelete